|
|
Post by buhwhyen on Feb 21, 2013 8:34:56 GMT -5
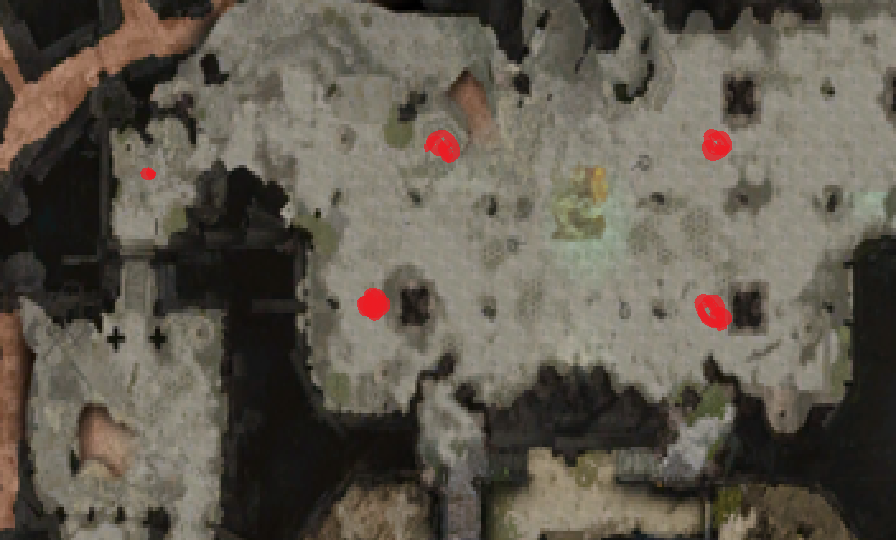
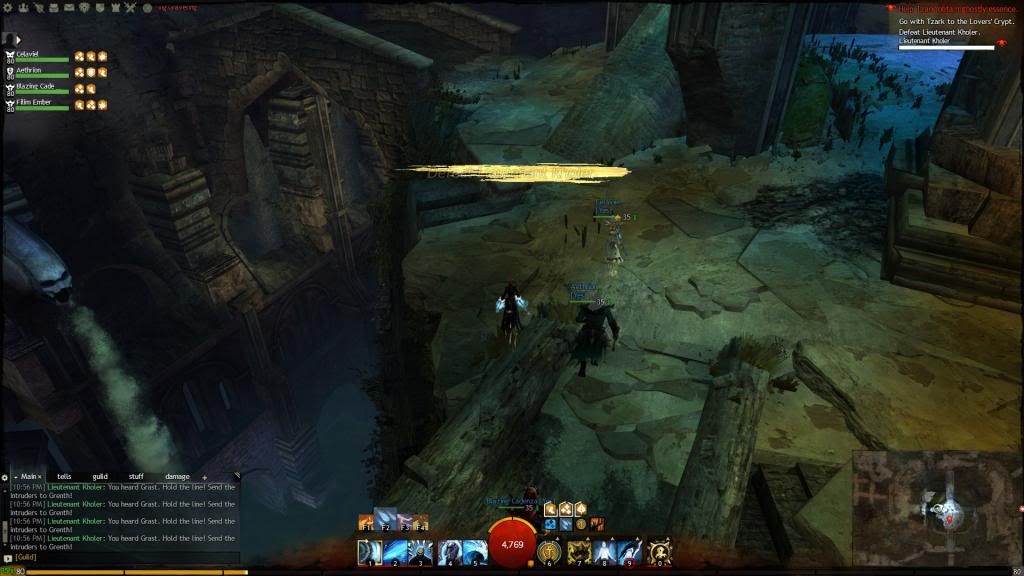
Ascalon Catacombs KEY: Share path (Orange), Path 1 (Red), 2 (Green) and 3 (Blue) Found this image on a random website, it conveniently has the paths already drawn on it. I'll separate the path specifics into separate posts. All generic info should be in this post. This is also assuming some skipping of trash pulls. I will include boss notes, however, we could potentially skip the spider queen and lieutenant kohler if we wanted to. Noteworthy MobsGraveling scavengers - these are the knockdown mobs that are responsible for ~80-90% of deaths in this dungeon. There is a relatively long charge animation for the knockdown leap (~2 seconds). Once you see the animation, be sure to dodge/block/stun break/interrupt. These are first targets, second only to breeders. Graveling breeders - These mobs spawn graveling hatchlings. They have a vomitting animation which also has a start up animation. Interrupt this ability whenever possible, these are typically the fist mobs you want to kill. Ascalon Monk - These mobs heal other mobs for considerable amounts. They should always die first. Ascalon Necromancer - These mobs use wells, fear, and whatever ability it is that gives you all conditions, except the duration is a lot longer. Overall they do way more damage than any other ghost. These are second priority after Monks. Shared path infoFirst pull is straight forward, single silver mob. Hop on the coffin on the right side of the room to avoid the spike traps. Trap and spider roomAs you're running to this room, a graveling burrow spawns. you can ignore it and just run past it. There is no reason I know of to actually fight it. Hug the left wall when you enter the room and avoid the gargoyle head's fire breath and watch for red circles on the ground (spike traps). You can avoid these by jumping on the rocks along the left wall or waiting for the red circle to disappear (they have a set duration before they expire). You want to jump on top of the gate. You want to do this to avoid the insta-down traps near the gate's opening. You want to kill as many gargoyle heads and spiders as you can without triggering the spider queen (boss). The boss is triggered by going up the steps towards the next corridor. It's a good idea to have condition removal here (lots of poison). Nothing particularly special about the spider queen boss. Spike corridorThe red circles on the ground are spike traps, like previously mentioned these circles will disappear if you wait a few seconds. The way to get through this part is to wait for the circles to disappear before proceeding. You cannot dodge, block, or go invincible to avoid spike trap damage. There is a chain at the end of the corridor on the left wall outside of the door. Pulling the chain will disable the majority of the spike traps in the corridor (but not all).  There is also a patrol in the corridor. Pull it to the entrance where there are no spike traps and kill the breeder first, then the other 2 silver mobs, and finally the champion. Bonus event - Cave trollThis is a random spawn event. It occurs right after the tunnel exit and before you reach Lieutenant Kohler. You can skip it by running past it without screwing anything up. If you want to kill it, the fight is straight forward, the troll really only has one big aoe stomp that sends you flying. Nothing special other than that. You can also drag the troll to Lieutenant Kohler and after they aggro each other, you can jump into the water and let them continue to fight it out. Lieutenant KohlerMost groups typically skip this boss because hes easy to fail on. He is a combination of a melee ranger and dagger thief in terms of skills used, but has one particular combo to worry about. He first has a pull skill which will hit every party member. It has a very distinct animation where he pulls back his arms, squats a little, and you see his hands glowing - the whole animation is roughly 2seconds long. You can dodge/block/reflect/stability this skill (can also LOS it, via pillars). After the pull skill, he then uses a more powerful version of Daggerstorm (throws lots of daggers at everyone in range). This combo is typically enough to down just about anyone even starting from full hp. And he has 2 silver mobs (type is random - monk/necro/elementalist/etc) that spawn next to him.
|
|
|
|
Post by buhwhyen on Feb 21, 2013 8:35:15 GMT -5
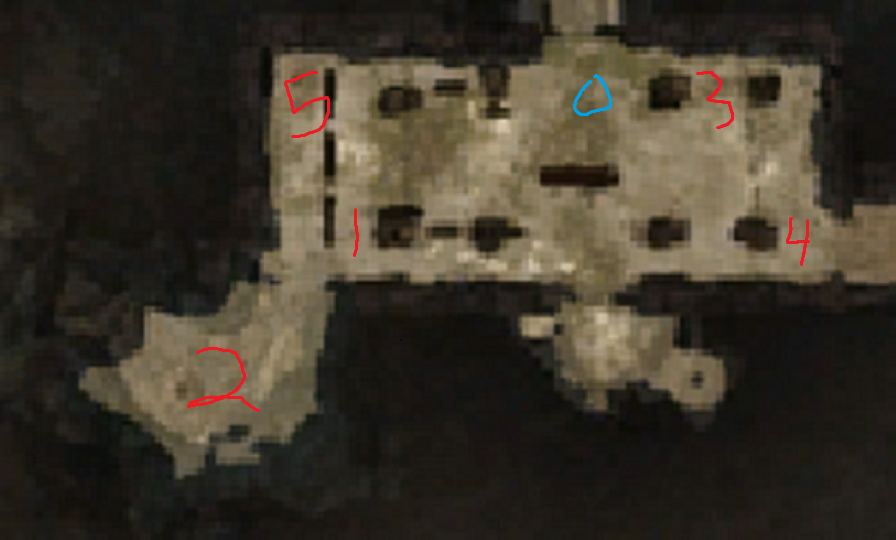
Path 1: Hodgins + scepterFollow the red path to the first room (east and then south from the exit of the spike corridor). Note: in the stairway down to the next room there are gargoyle heads lining the stairway down. They will fire in sequence from the top of the stairway down to the bottom. The timing to run down does not leave a large margin for error. So I'd suggest either using a movement skill to get you down quickly (greatsword for warriors, ride the lighting for elems, etc) or you jump on the gargoyle heads, which allows you to avoid the majority of the fire damage. Defend Hodgins + kill burrows One person defends hodgins (kite/kill mobs that get past other people). They are also responsible for killing the blue burrow 0 that spawns near the door during the beginning of the event. The four remaining people kill the burrows in the order shown in the picture. Note: burrow 4 does not spawn unless the blue burrow 0, and burrows 1, 2, and 3 have been destroyed. For this event elementalists should use the conjure frost bow utility. It's ability 4 can kill a burrow on it's own if the player using the bow has sufficient power (it's damage scales with the wielder's stats - namely power). For most players, a frost bow 4 should do roughly 75% of a burrow's health. Note: Burrows have been fixed so stationary skills such as a warrior's hundred blades can consistently hit them. However, they are still bugged for ranged dps. That is, you will still frequently get target is obstructed for no real reason. Finding the next scepter pieceGo through the south door and follow the stairs up till you find a coffin. All you need to do is find and open this coffin for the next event to trigger. Collect scepter pieces Follow the red path to the next event, you should be able to easily skip (run by) all the sets in the rooms in between. There are five pieces to collect. This part can be completed by one person, however, it is considerably easier if multiple people go. I might have to edit the picture, I'm not sure on the exact locations of the pieces, but they are generally situated in the general layout shown. Kill the Howling KingTo get there you have to run through the graveling tunnels. You should be running by all the sets till you reach a point north of the explosion symbol indicated where the Howling King is. Note: The path we usually run is actually the middle branch, whereas the path shown in the picture uses the bottom branch. It shouldn't make a huge difference as long as everyone sticks together. The key here is that you want to deaggro any patrols that you run by. However, you do need to kill the two breeders at the end to secure an area to fight the boss in. You typically also want to clear one additional breeder from the pit where the Howling King patrols. The Howling King has 3 abilities, the first is his scream/howl which hits in close to a 180 degree arc in front of him. It is multi hitting, so you can dodge after initially getting hit and not get downed, but if you do not react/dodge out of the way, you will get downed by it. The second ability is a more powerful version of the graveling breeder spawning. He will spawn 1-2 silver mobs and some other hatchlings. The last is a burrow ability where he is not targettable and tunnels towards one player and knockbacks and damages players near where he unburrows.
|
|
|
|
Post by buhwhyen on Feb 21, 2013 8:35:32 GMT -5
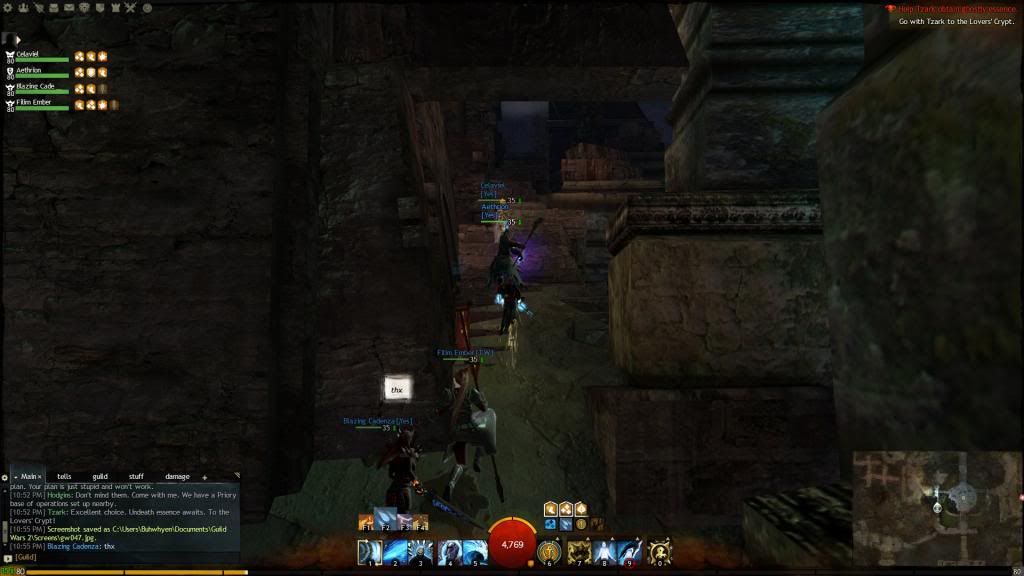
Path 2: GhosteaterThere are 2 ways to skip Kohler and get to the next area. The first is outlined on the first map's green path. You run up the the stairs leading to Kohler, and jump the corner to Kohler's platform (you don't actually walk through the gate). The other route (that I like better because it avoids jumping - which you can fail) you hug the left wall coming out of the spike corridor go up the stairs, across the bridge to kohler's platform, walk around behind the pillars to the eastern bridge (pictures below). You can skip all sets that spawn, just keep running till you reach the spike trap pit for the next event.    Spike trap event Spike trap eventThere are 5 chains that trigger spikes in a square grid. The center's of the spike traps are aligned like: (edit) The traps themselves overlap each other slightly. The basic strategy for this part is to have 1 person kiting all the spawns inside the traps, while the remaining 4 use the traps to kill the breeder champion that spawns (and keep Detha alive). It's easy enough for one person to handle 2 chains, so if you see the person kiting go down, whoever is only operating one chain on the ledges should go down and kite. We use a different path than the one listed on the image to get to the next area. Though if you wanted to, the green path also works, but you have to be careful of aggroing Kohler. The path we usually use is to run north past the door to Kohler, up the stairs and to the left towards. Cannon eventGroups of 4 ascalon ghosts will spawn at a time (silver mobs). The type of ghost spawned is random. The general order for which mobs to kill first are (highest to lowest): monk, necromancer, ranger, mesmer, elementalist, warrior. The important part is to not wipe, only 8 mobs should spawn per cannon rebuilt. You can just revive Detha at the end and have him finish repairing the cannon. On the last cannon, you don't have to kill all the mobs if Detha finishes repairing the cannon first. GhosteaterEasy boss. Has burrow like the Howling King. Also spawns ghosts which will kill downed players, but they are generally harmless. Cannons are useless, though to be fair they did get buffed and I have yet to try them out post buff.
|
|
|
|
Post by buhwhyen on Feb 21, 2013 8:35:51 GMT -5
Path 3: Colossus
Similar to path 2, you need to run over the east bridge near kohler. One relatively large set of ghosts will spawn in the tunnel leading to the lover's crypt, you should run past this into the crypt (you don't backtrack in this path).
Defend essence collectors
This is a kill the burrow event. If you have an elementalist, use conjure frostbow. Try to avoid non-aoe ranged dps because burrows are still bugged as previously mentioned. If necessary, one person should be dedicated to tagging/killing silver to make sure they don't kill the collectors. However, in general everyone should be focusing down the same burrows. It shouldn't be a problem to kill a burrow before the next spawns.
Follow the path north to the next event.
Burrow killing part 2
The event is simple. Kill all the burrows. You don't have to kill any of the gravelings that spawn along with the burrow. I would strongly suggest bringing stun breaks and/or stability to avoid dying to random scavengers here. Note: all enemies despawn after the last burrow is destroyed.
Run through the graveling tunnels similar to path 1, but the route is shortened. Kill the same 3 breeders before pulling the boss.
Colossus Rumble
Has the burrow ability like all the other bosses. But his other ability is to channel rocks that drop on you. These rocks will cause a long knockdown and do considerable damage. Consider bringing a stun break.
|
|
|
|
Post by buhwhyen on Feb 21, 2013 8:36:08 GMT -5
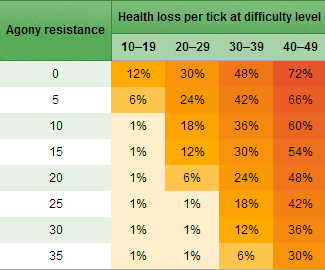
Fractals of the mistsThe "dungeon" (though not actually counting as a dungeon) is located in Lion's Arch (closet waypoint is claw island portage waypoint)There are 9 fractals, some (but not all) have 2 possible paths. The path you do is chosen at random. There are fractal "levels" which correspond to how difficult the dungeon becomes and also the quality/quantity of the rewards you are given for completing it. In general, things only significantly change every 10 levels. For levels 1-6, only the difficulty of the mobs increases (they hit harder and have more hp). At level 7 you start seeing additional monster spawns, though you can only notice because they spawn in some places where they previously did not. The big jump is at level 10 when agony is introduced. Can I run fractals?Since fractals doesn't have a level requirement any level character *can* run it. Though I want to be somewhat careful about how this is interpreted. While the game upscales you to level 80, it is still considerably more difficult than what you would be used to if you had not yet tried other dungeons or late game content (I will use Orrian areas as an example of other late game content). Does this mean you can't do fractals if I haven't done dungeons? Well...no. You definitely still can, and you can (most likely) succeed on your first try. Just be aware it's not simply you meet the level requirement and all will be fine. The dungeon (actually all the dungeons in this game) was made under the assumption that you are already used to dodging big attacks (shown by red rings - or just the combat system in general), and you know what all your skills are and generally what they do. The biggest obstacle to doing fractals is really an understanding of what you're supposed to be doing. Fractals are more involved than most dungeons. Some require you to just understand what to do, or you just die/fail/waste time. Which is what the next few posts will be about - doing fractals, and shit you should know to not fail. Miscellaneous stuffAt some point (particularly on higher level fractals), there will be fights where you really don't want to melee, or at least want to have the option to dps from range. You should always have one, but just in case, make sure you have some sort of ranged dps weapon. For newer players and even more experienced players that haven't done a lot of fractals. A good idea to learn fight and events is to use a ranged weapon and observe when other people dodge and what things they tend to focus on. Fractals hit quite hard, so it might get frustrating to melee and get 1-shot frequently (this happens pretty regularly - starting around lvl 7). AgonyIf your fractal reward level is nowhere near 10, or if you don't know what a fractal reward level is, you can skip this section. Agony only applies to levels 10+ and you really don't need to consider it till you progress further in levels. Table of agony damage from the wiki:  For those who are having difficulty reading the table. What it says is agony will do per tick in % of your health (based on what level fractal you are in). The only things that inflict agony are end of fractal bosses, and the duration is usually ~3-4 seconds. For the Jade Maw boss, you get inflicted agony as soon as you trigger the boss, and for an extended longer duration ~6-7 seconds. This means for fractals 10-19, if you have 10 agony resist, agony does little damage (1% per tick - 200 per tick if you have 20k health), but if you have none... it hurts (20k health - 2400/tick). The numbers in the table might not be entirely correct. From what I've heard the amount of damage agony does went up in the January update. Do you really need Agony resist?Short answer: Yes. Long answer: Yes, but only at higher fractal levels. It is possible to get to roughly level 15, maybe even to 19 without needing agony resist. This is because the majority of agony can be dodged/invulerabilitied. Realistically, you will get hit by agony. If you do not have agony resist, and you are at ~50% hp, you will almost definitely go down (agony also reduces healing). Bosses naturally hit harder as fractal level goes up. It's not uncommon to see people go from 100% to down just because they got hit by a boss once (30-40% damage from the actual hit, the rest from agony + whatever burn/bleed/poison). The argument that you can just avoid getting hit by agony is pure theoryfighter. It is the same as saying I just won't get hit by X. Under perfect circumstances, sure you can avoid it with high consistency. But odds are you'll get distracted by something (random adds, needing to help rez an ally, being tired, something/someone in RL, etc) and you will get hit. For those still not convinced. Honestly ask yourself: how many boss fights have you gone through (in GW2) and never once gotten hit?
|
|
|
|
Post by buhwhyen on Feb 21, 2013 8:36:28 GMT -5
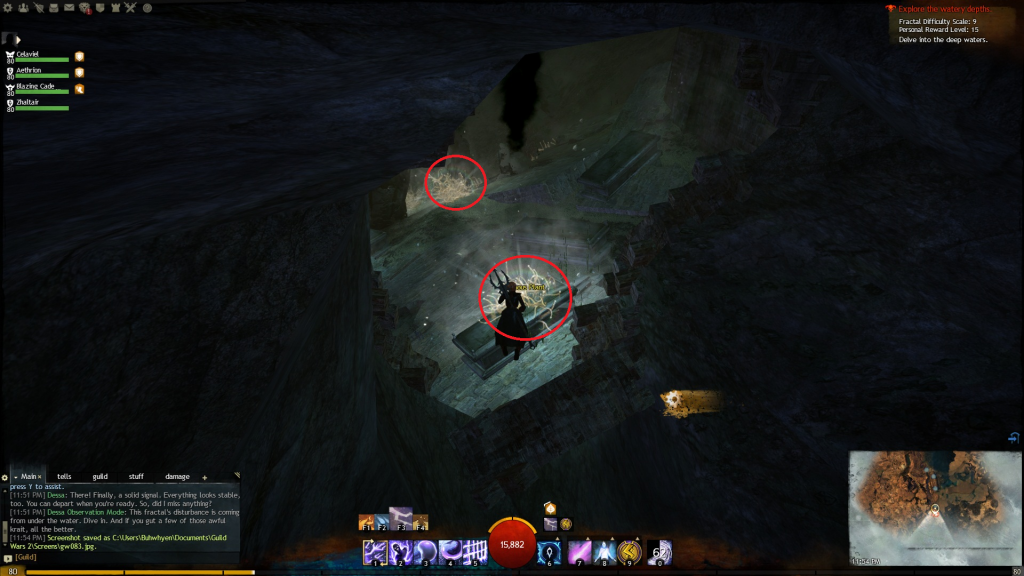
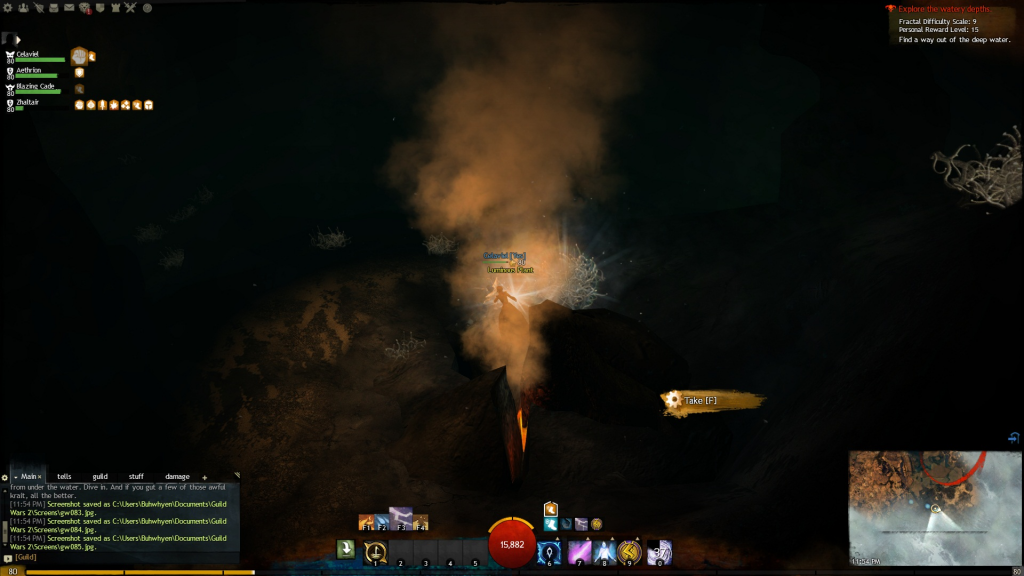
Aquatic Ruins FractalThe only underwater fractal. There are 2 possible paths for this fractal. Shared pathIn the beginning you do the same initial event before separating into the 2 possible paths. The first event is simple: kill the krait around the prisoner cages and subsequently freeing the prisoners. After this you backtrack to a small tunnel entrance marked by 2 blue flame torches. This is where the paths split, depending on which way the tunnel leads you determines the path.  Path 1: Investigate the deep Path 1: Investigate the deepYou are lead into a dark room. You have to swim to the next lighted area until you reach the end. However, you constantly take a large amount of damage and are inflicted with various conditions. To counter this, there are light (luminous) plants which have an item (1 per plant) that temporarily (~5 second duration) makes you (and other around you) immune to the damage you would otherwise take. So the idea is to stick together as a group and swim between the geysers areas till you reach the end. Alternatively, if this is too difficult for one or more members of the group; this part can be solo'd and anyone dead can checkpoint past it. luminous plants  geysers that are safe havens from environmental damage  Path 2: Sneak past the Krait Path 2: Sneak past the KraitYou are turned into a fish and have to swim past a large number of Krait in an underwater maze. Your skills are replaced by 4 skills: 1) Sonar - detects hidden Krait in an area around you 2) Decoy - creates a dummy fish that will attract nearby Krait and take hit(s?) for you. 3) Dash - Gives you a movement speed boost in a straight line in front of you (you cannot change the direction during the move). 4) Revive - Revive target ally (ranged revive) and teleport them to your location The keys to this part are: to spam Sonar so you don't get ninja'd by random hidden enemies. To use decoy whenever you are approaching Krait you have no choice but to swim by. And to dash only when you are being chased/need to get by something quickly (never to just go faster without a reason). If someone dies and you cannot easily revive them (ie without turning around and risk dying yourself) then keep going and they can just checkpoint once you get through this area. Giant Jellyfish bossThis boss spawns jellyfish adds and has 2 other abilities: a spin which stuns and does moderate aoe damage, and also consume, which eats a player/pet. The consume does agony damage and little damage on its own, but also gives the boss a full stack of 25 might. The boss has very high health. It takes a long time to dps him down by yourselves, so you should try to lead him to the electric cages (a few light up at a time) which do considerately more damage to him.
|
|
|
|
Post by buhwhyen on Feb 21, 2013 8:36:45 GMT -5
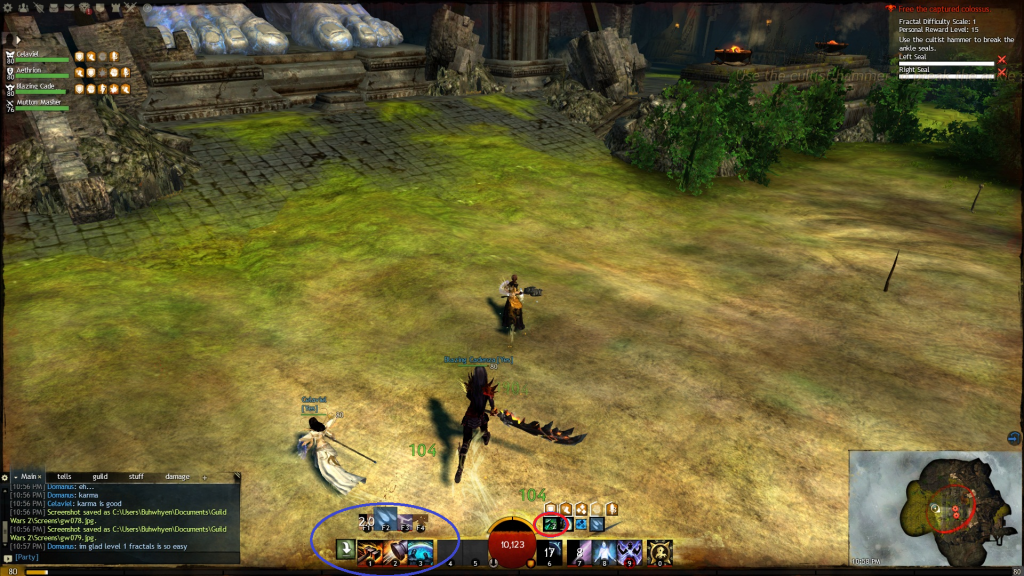
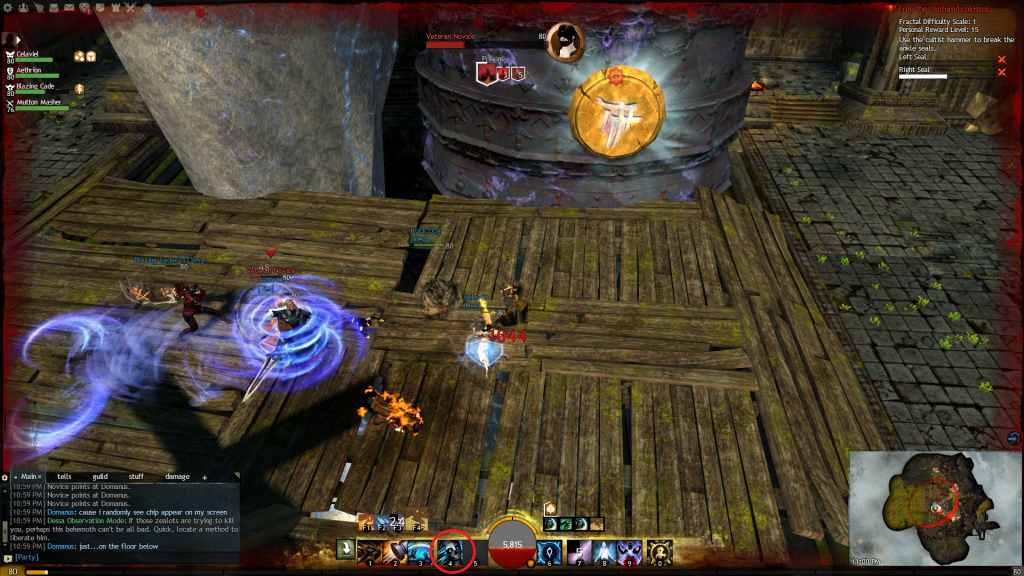
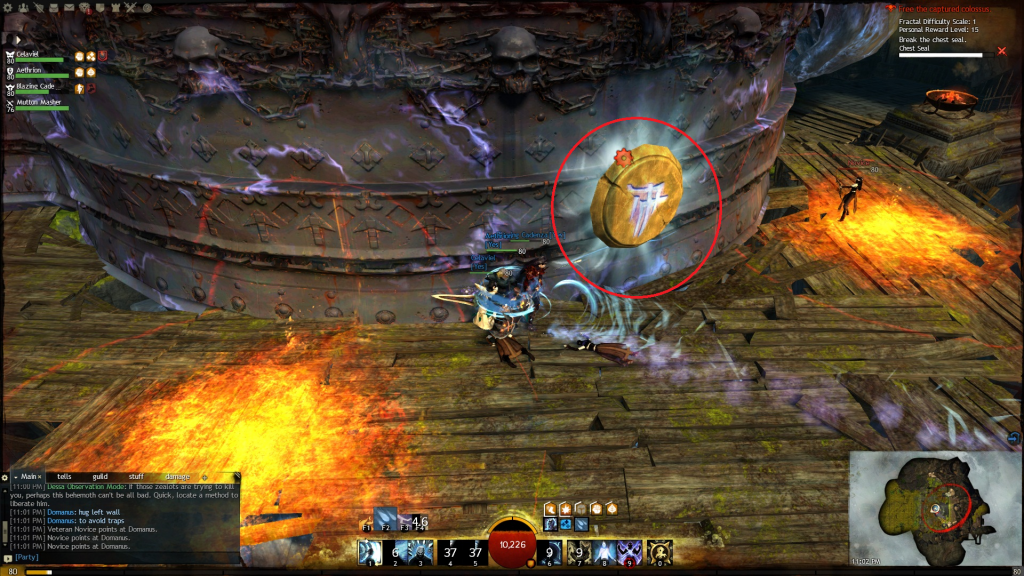
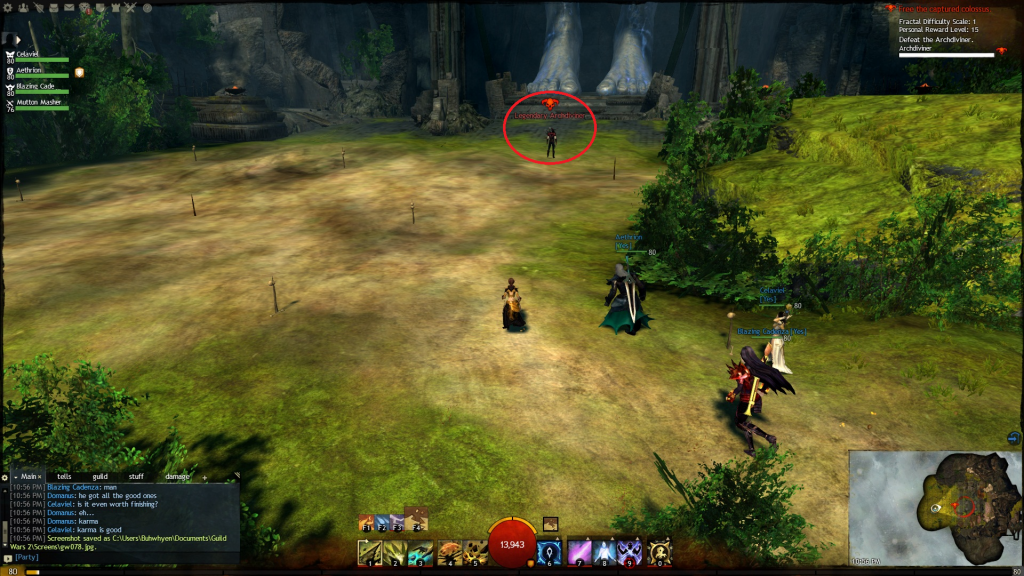
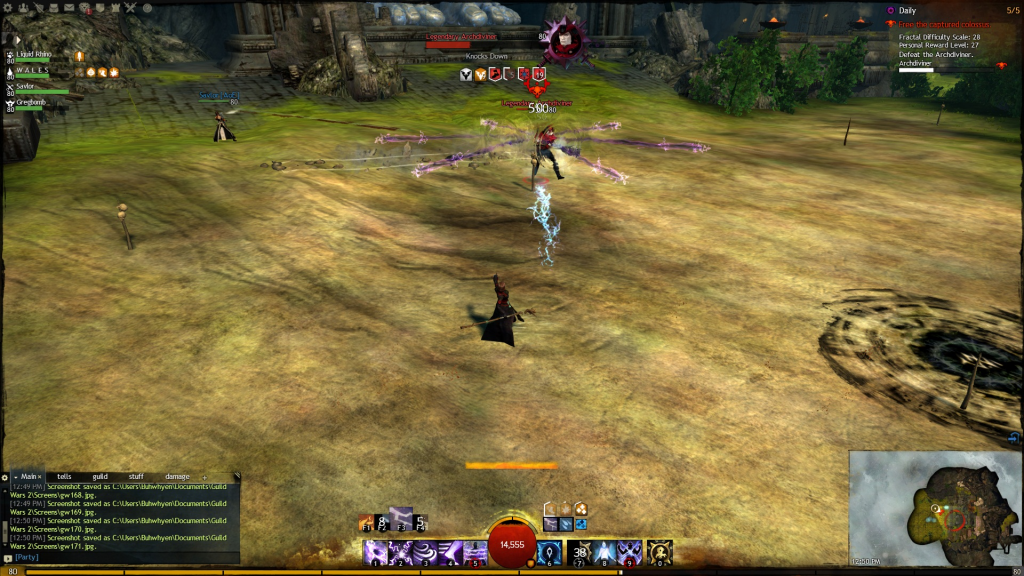
Cliffside fractalMight be easier to recognize as the Colossus fractal. This is one of the tricky fractals. The basic premise is that you carry a cursed hammer around and break the seals that bind a colossus. Archdiviner's HammerPicking up the hammer will do considerable damage and inflict a corruption condition (cannot be removed via condition removal). It stacks up to 40 times at which time it will down you. At 30 stacks, corruption will stun you (can be avoided via stability/invicibility and removed with stun breaks). Between that it will inflict random status affects. To move the hammer requires at least 2 people taking turns holding it while the other(s) lose the corruption stacks. The hammer itself changes your weapon skills, but leaves your utilities and elite skill in tact. The weapon skills change to: 1) basic attack - what you will be using all the time to charge the hammer 2) knockback attack - does less damage than basic attack 3) shield/stability - not very useful 4) break seal - requires charge and damages seals. Unlocks only when hammer has a charge   As mentioned the hammer needs to be "charged." By killing an enemy the hammer gains a charge and unlocks ability 4 (break seal) to damage seals. You do not need to deliver the final blow, tagging mobs is sufficient to gain a charge. Not selected on the below picture, the seal's health is shown in the top right portion of the screen where dynamic event info is displayed.  Traps between seals Traps between sealsBetween the seals you need to run up the side of the mountain. Along 2 of these paths are traps that knock you off the path. Patience is key here, rushing through will likely get you knocked over the edge - and therefore need to start over. Bringing stability is recommended if you have trouble getting through these areas. Archdiviner The "boss" of the stage. Oddly, you fight him at the beginning to get the hammer initially, and also at the end of the fractal. His abilities are pretty insignificant. He channels and creates a number of wells around him. The wells inflict minimal damage, but spread some conditions. If you run out of the red circles as they appear, you can avoid the conditions. In the first fight he also has earthshaker (minus the knockdown), where he leaps and strikes you with his hammer - he does not do this during your 2nd encounter. During the second encounter he will randomly put one person in jail and also summon 2 bone fiends to aid him. Overall he's a pushover boss. Confuse attack During first encounter only  Breaking seals Breaking sealsThe first set of seals is very straight forward. Kill stuff and damage seals - nothing special. The second set of seals there are fire traps on the floor. You have to avoid the fire and kill stuff to break the seals. There are a few safe spots near the edges where the edges of the traps don't overlap. The best one is right between the seals on the colossus. You don't have to move and just dps any ranged mobs down, and let whoever has the hammer tag mobs. The last seal is more involved. There are 2 seals, but they are separated by a tunnel. Every time you damage one of the seals, it becomes invincible until the other seal is damage. Meaning, you have to alternate hitting the left seal, and then the right. This also means that you have to constantly run between the two seals. After you break the 3rd set of seals, you do not need to carry the hammer. After the 3rd set of seals, you run through one last set of traps and then reach the final boss. The final boss encounter is a mix of the first fight and the breaking seals you've been doing during the rest of the fractal. After doing enough damage to the boss, he will drop his hammer and you have to kill an acolyte spawn and damage the seal in the middle of the room. Repeat until the seal is broken. Currently there is an exploit/bug where you can get the boss to constantly drop the hammer after the first time. This means that essentially you get him down to ~80% hp and then just kill a few acolytes and the fight is over. This is accomplished by stacking on top of the boss after he drops his hammer. One person runs to an acolyte while only ranged dps helps him get a charge on the hammer. The remaining 4 people stand directly on top of the boss, after the seal is damaged, the hammer should drop instantly under the boss and he should be stunned once again and you can repeat killing an acolyte and damaging the seal.
|
|
|
|
Post by buhwhyen on Feb 26, 2013 0:22:33 GMT -5
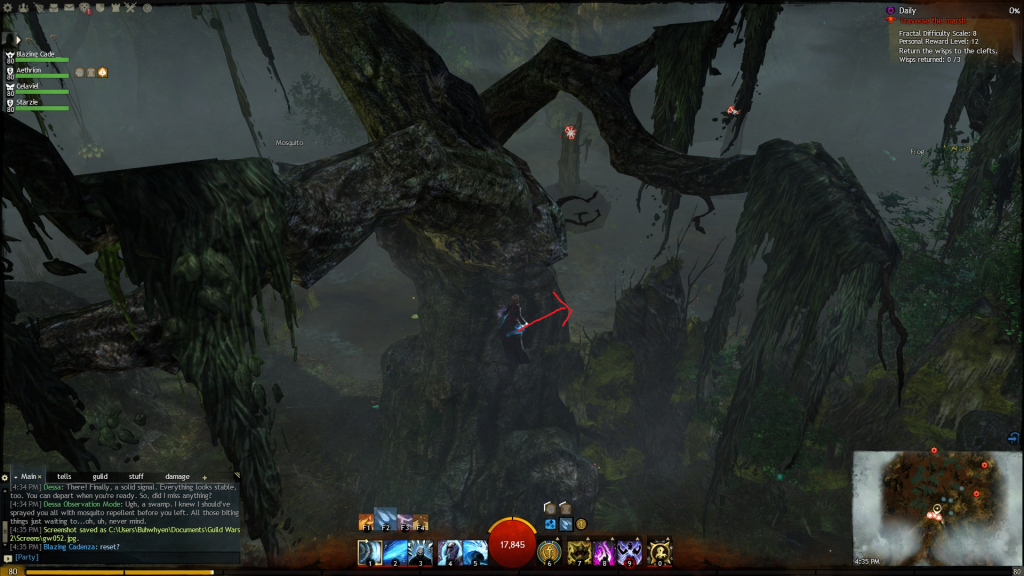
Swamp FractalThis is the shortest fractal if you can do it, otherwise this can take an exceedingly long time to complete. The basic idea is that you have to run 3 wisps back to their stumps within the allotted time. The spawn locations are fixed, but random - that is they can spawn in up to 8? or so locations, but the locations are chosen at random. Each area has 3 entrances, 2 of which will close on you at random as you approach them. Notes: -Reset just about anything that has a wisp in the top center/left. These spots are very difficult to run successfully because the center has no place to jump over consistently. The topleft has one spot to jump, but its not easy. The only time that these spots should not be reset is if you have a Mesmer in the party that can portal it. -The bottom right spot has a number of eggs (see picture). These eggs spawn spider hatchlings (lots) when touched. Do not approach the wisp until you are ready to start running (start running towards the wisp before the countdown to start ends).  -Mossman will teleport around the map at random. Run away from him, do not try to fight him. -There are traps littering the floor. Tripwires and another trap that immobilized and cripples you. They are visible, but difficult to see (they blend in with the swamp terrain). The best way to avoid them is to jump over or go around (or use stability). -If you have a teleport skill (blink for mesmer, lightning flash for elementalist, etc) you can teleport through an entrance before it closes - assuming the wall does not fully materialize before you activate the skill. -You can jump over the walls at specific points. The most prevalent one is shown in the pictures below. It is right next to the center entrance to the tree stumps where you return the wisps.   Other Jumps Other Jumps
Top Left Top Middle (also can use for top left spot - easier jump) Top Middle (also can use for top left spot - easier jump) Boss 1 - Mossman Boss 1 - MossmanHe is a melee boss. He occasionally will stealth and when he reappears he does large amounts of aoe damage (can 1 shot at high levels). He spawns wolves (non vets) when he stealths. And he has 1 particular big attack to worry about. He stands in place and raises both axes above his head, after about 1-2 second delay he does huge aoe damage. There is currently a glitch where if you stand under the bridge to the left of the house he spawns at, he won't attack you and you can just dps him down while /afking. Boss 2 - BloomhungerGiant plant boss that is completely stationary. He will occasionally spawn spirits (they will have a purple beam connected to bloomhunger) that give him buffs if you do not kill them. Make sure you kill the spirits as soon as you can. He has a basic attack and 2 other abilities. The first ability is poison cloud that does considerable damage, easy avoidable. The other is a giant shockwave spell (the only spell that does agony lvl 10+), if you're not meleeing, there is no excuse to get hit by this.
|
|
|
|
Post by buhwhyen on Feb 26, 2013 21:49:44 GMT -5
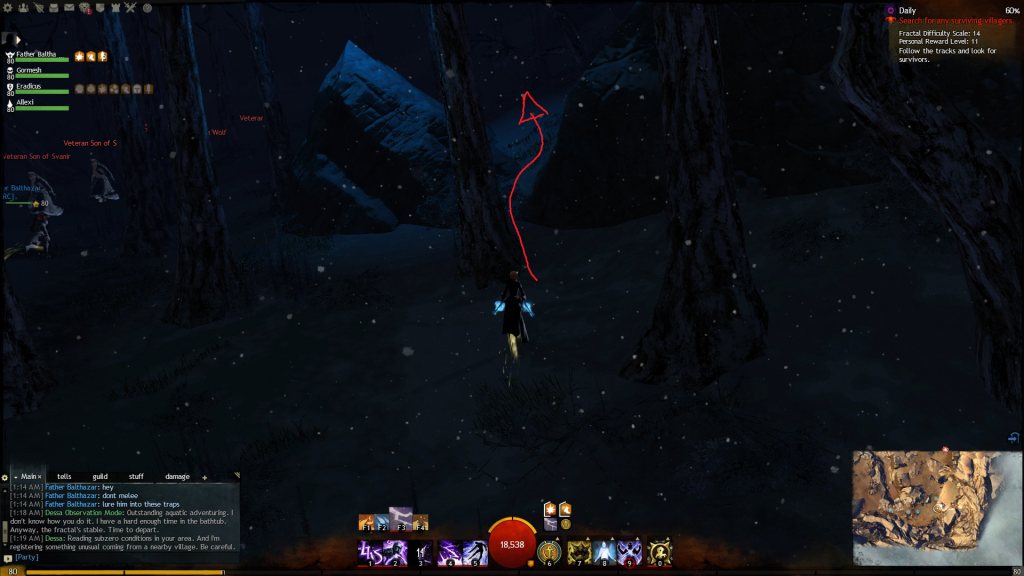
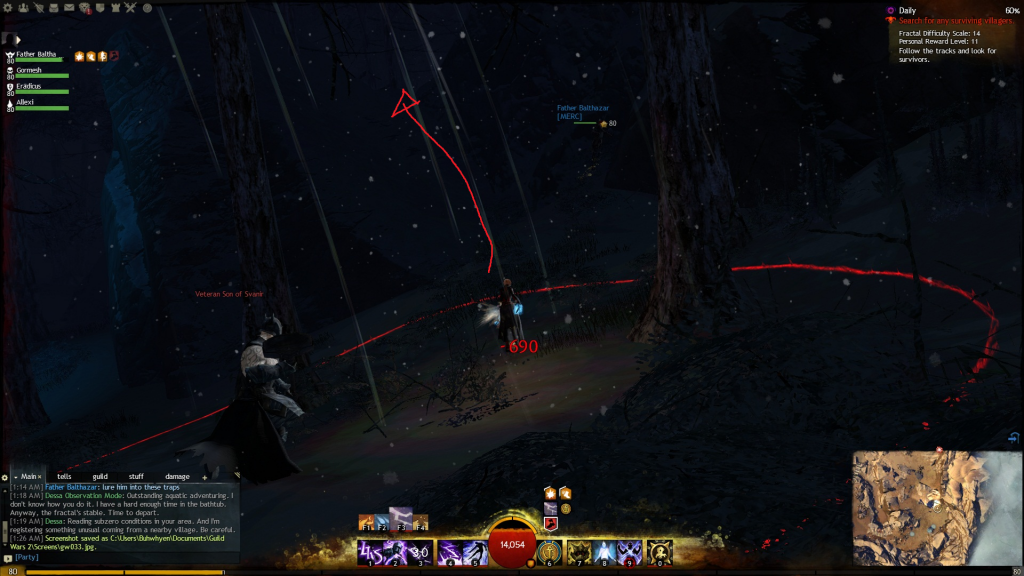
Ice (Snowblind) FractalFor the first section of this fractal, you are constantly afflicted by a non-removable condition frostbite. This stacks up over time to a cap of 25 stacks. While afflicted you move slower and take damage. The only way to remove the condition is to light and stand near a campfire. You will need to light campfires as you run down the side of the mountain to remove frostbite. At the bottom, you will defend a larger campfire while for a period of time until a wall goes down and you can proceed. Note: once the wall is down, you do not need to kill all the mobs, you can simply run away from them and proceed to the next part. Ice Fragment mini bossThis boss is an object, not a monster. That means that conditions are useless against it. It has a few abilities, the most prominent being an aoe knockdown. For this reason, you do not want to group up too closely to one another, and if one person goes down, not all 4 people should go try to rez. It will also periodically teleport (relocate) everyone to a random location within the area. While this happens a blizzard will appear and your vision will be limited. You need to make your way back to a campfire and regroup. The easiest way to get your bearings is to use personal waypoints (alt + left click) to mark where the campfires are you should be heading to. After/during the blizzard/relocation a few ice elementals will spawn. For the most part only 1-2 people should kill them off while everyone else focuses on the fragment. Make sure to light one last fire before you leave to remove any lingering frostbite. It won't go away for 10 minutes otherwise. Running to the bossYou will run through a dark forest on the way there with 3-4 groups of mobs. You can and should run past these to save time. There are 2 shortcuts through the hills that you should use to your advantage to shorten the run and help avoid the patrols.   Son of Svanir Shaman Son of Svanir ShamanThis boss is pretty easy. The only 2 major things to worry about are: his frost breath and the ice spikes. His frost breath can be interrupted if you eat through his resistance stacks. It applies stacks of an non-removable dot that does considerable damage. If you are targeted by him run away, not just in circles (there is no need to troll your group and get everyone else hit by this while you are not actually dodging it). The ice spikes refer to when he teleports on top of a ledge and ice spikes will constantly fall in the area. There is a safe spot which is:  He has 2 other abilities that he uses. One is an ice prison sort of spell. He freezes you and you're unable to do anything for ~8 seconds. He does this very infrequently and there's really nothing you can do about it. The other is he creates 2 icewalls that limit your movement. These can and usually should be destroyed. If you do not enter his chamber before the door shuts. Use the banner in the tunnel. 
|
|
|
|
Post by Pikachu on Feb 27, 2013 13:26:17 GMT -5
Wow, good shit adding the screenshots in!
|
|
|
|
Post by buhwhyen on Mar 15, 2013 12:34:41 GMT -5
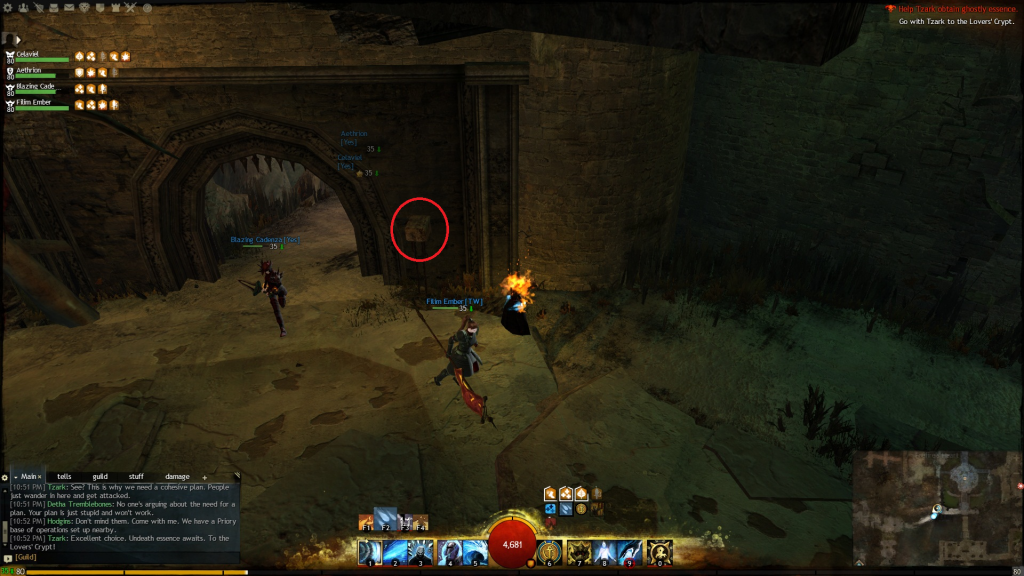
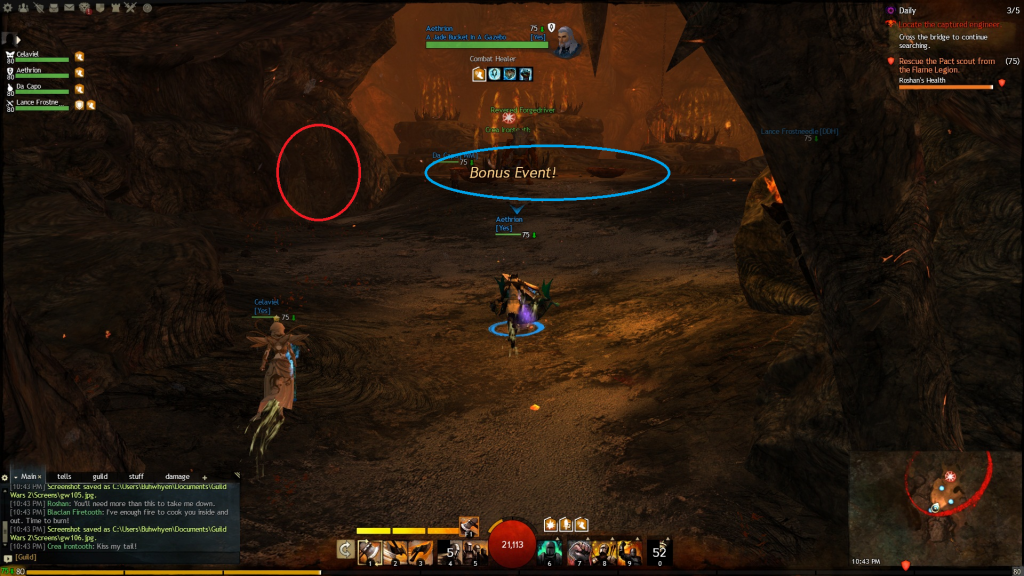
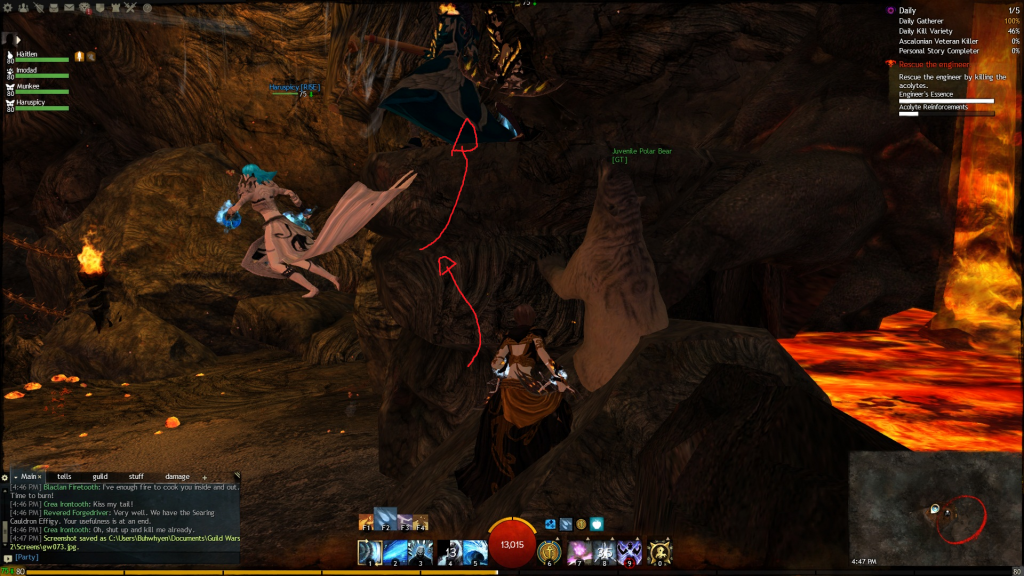
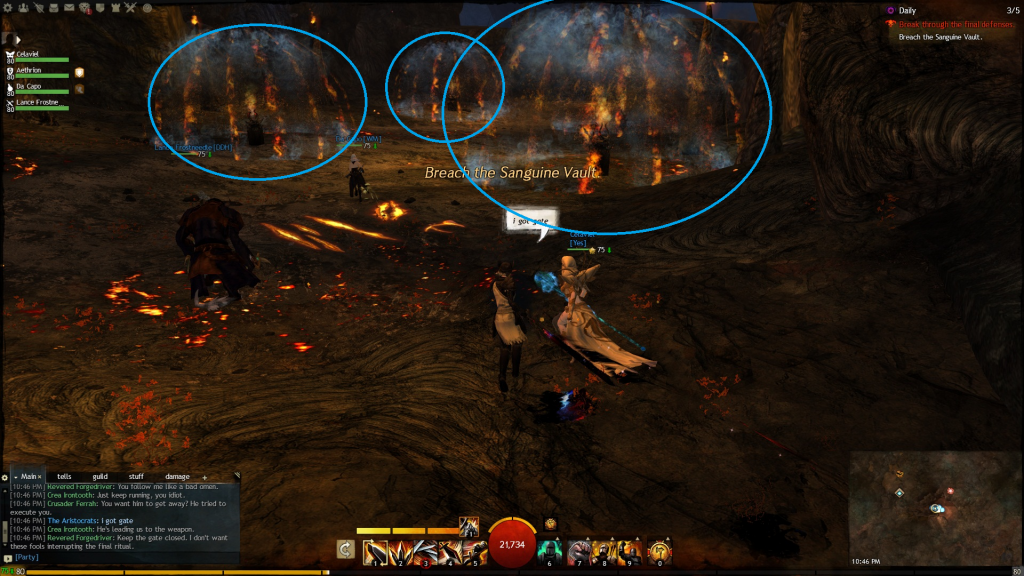
Citadel of Flame - Path 1First set has 2 flame turrets and 2 silver mobs. Kill the turrets first, then the mobs. The first miniboss is just down the slope after this set. Slave driver This boss starts off by himself, but after a short while he will summon a veteran effigy. You want to ignore the effigy spawn because it will disappear after the slave driver dies. Nothing special about the slave driver himself. Running portionUsually the next part is skipped past, but there is an event on the bridge to rescue the engineer. The benefit is you get an extra bag of wonderous goods (3 dungeon tokens, 1 vial liquid karma, 1 bag of coins). But skipping saves ~2 minutes (on a ~12-13 minute run). If you choose to run past (usually do) you will skip the spawns on the bridge and the set of turrets + mobs and run past into the next room which looks like...  Blue circle is where the acolytes will spawn, the red circle leads to the room where you will run to during the event.  The event is to kill acolytes. You will need to kill 10 of them, but they only spawn 4 at a time. There will also be a large number of other mobs, mostly veterans/silvers. The idea is to kill only the acolytes and run away from everything else while they're respawning. If you refer to the tunnel shown by the red circle in the picture above, it will lead to a room where you can drop aggro as shown below.   Boulder corridor Boulder corridor You need to run flaming boulders through the boulder trap (insta death if you get hit) and light flames on the other side. There are 5 boulders you have to run by. The easy way is to have a mesmer who runs as soon as the door opens, blinks to the end and portals the other 4 members (who have picked up the flames). The flames last ~15 seconds so you need to be relatively coordinated if you do not have a mesmer to portal you. Also dying in the trap causes durability loss, remove your armor and backpiece if you don't have a mesmer. Gate and flame barrier eventThere are 4 pillars that need to all be activated in order for the gate to be exposed and killed (this event ends when the gate dies). Each player will need to take their own pillar and stay under it while one player kills the gate. The pillars with the flame barrier graphic. The 4th pillar is behind the one on the right.  The gate shown behind an open gate.  Each pillar will spawn 4-5 mobs (non-vet/silver) when triggered/activated. Each pillar will create a flame barrier which signifies the point is activated. You have to remain under the barrier to keep it activated (this means do not leave, even if you are going to be downed. When all 4 points are activated, the door will open and expose a “gate” which needs to be destroyed. This gate is an object (and therefore is immune to all conditions) and is guarded by a silver flame throwing mob. If for some reason one of the points becomes deactivated (someone leaves the area around a pillar) a knockback barrier appears and the gate becomes immune to damage. Best classes for killing the gate -Warrior -Elementalist (d/d) -Ranger The silver flamethrower mob has a vacuum pull ability and has a powerful flamethrower attack. The main reason why warrior is the best is because hundred blades and stability (balanced stance/dolyak signet) allow them to dps them down without being interrupted. And the use of endure pain makes it very safe to kill the gate down. Similarly elementalists have pets that they can use to tank the mob while they dps the gate down, and also have easy access to stability. Ranger is a distant 3rd mainly because their shots can be difficult to land depending on where the mob is standing relative to the gate that needs to be killed, and also have lower dps than the other 2 classes. End bossYou can (and should) ignore the fight mechanics (killing the crystals). Just dps him down and ignore everything else. There are 3 things to watch out for: -Flame thrower. Cone attack in front of him. He doesn't turn while using this, so just move out of the away. -Stomp. Does moderate damage, but for the most part you can just tank this attack without much issue. Has a very large red circle and the boss channels this attack for at least 2 seconds. -Crystal drop. Does knock back on hit, also hits pretty hard. You should try to avoid this attack. Has a smaller red circle than the stomp.
|
|
|
|
Post by buhwhyen on Mar 30, 2013 4:39:13 GMT -5
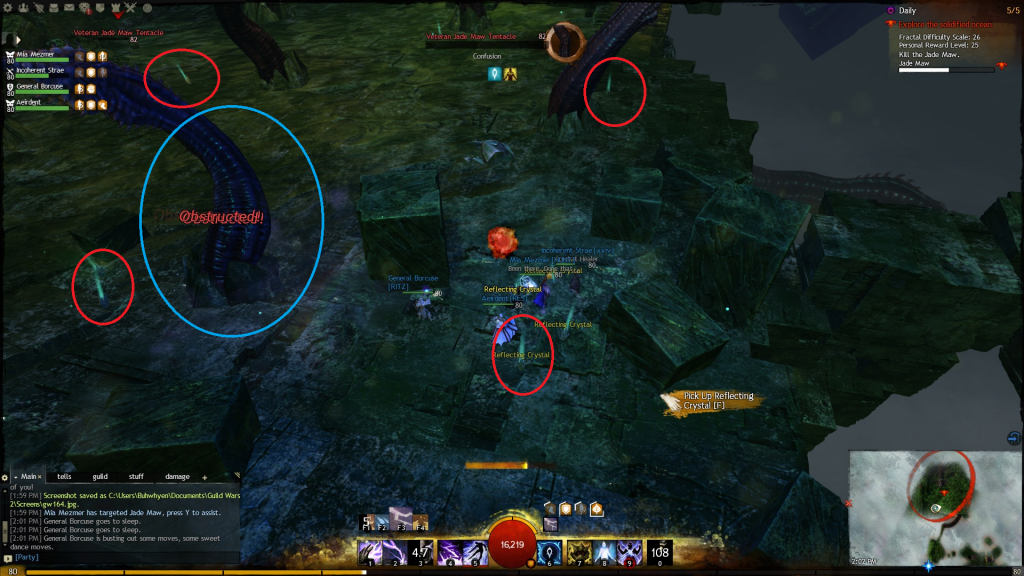
Solid Ocean Fractal - Bonus FractalOnly on even level fractals. It is always done after you complete the 3rd fractal (its the 4th fractal on an even level run). You can either run past all the mobs or kill them. Supposedly you get good loot from these mobs, but I haven't seen any significant difference from other random trash mobs in fractals. Recommended You bring stability/stun breaks and some form of mobility. Jade MawThere are 3 stages to this fight. The first stage you have to clear 2 tentacles (you can ignore all the other mobs, they disappear once the 2 tentacles die). You can run around to the left and jump up onto the back wall and range the tentacle on the right first while drawing minimal aggro. You need at least 900 range for this. Which begins the second stage, where the real fight begins (mechanics to be explained afterwards). 6 tentacles will spawn in a circle and a few jade colossus will spawn. The maw will also mark one person once this happens. Most likely you will not be able to grab a crystal in time (they do not spawn instantly) so dodging/going invincible is recommended. The way the second stage is finished is by killing all the Jade Colossus shown by the progress bar in the top right portion of the screen (screen cap later). After all the Jade Colossus are killed, the third stage begins. When the last Jade Colossus dies, all the tentacles will respawn, so it is recommended that you are not in the center of the platform because you can be chain knocked down until you die. No more Jade Colossus will spawn, only tentacles. When the Jade Maw is about to die (hp bar is left with 10-20%) it will do a final attack. Its final attack marks all players in the group and if no one survives then the boss' hp resets to full and you have to start over. Note when this happens reflective crystals will spawn in the general locations where the tentacles do and all tentacles still alive will disappear. MechanicsAs mentioned the Jade Maw will "mark" a player with a skull above their head.  When you get marked by this skull over your head, the Jade Maw will shoot a laser at you after a slight time delay (~2 seconds). Before you get hit, you need to pick up a reflective crystal. If you are holding a reflective crystal when you are hit by the Jade Maw laser, the crystal gets a charge which allows you to throw the crystal at the Jade Maw to damage it (this is the only way to damage the Jade Maw boss). If you cannot reach a crystal or do not have anymore, then you can dodge the laser itself or go invincible to avoid dying. If you get hit by the laser, you are instantly downed. If you are already downed, you will die. You can still be marked if you are downed. Pets and illusions can also be marked, it is suggested that you go light on pets and illusions to speed up the fight (not waste lasers on something you can't reflect back at the boss). Reflective crystals and Tentacles  How do you get reflective crystals? How do you get reflective crystals?When a tentacle spawns it drops a crystal. Also when a tentacle or colossus dies, they both drop one as well. Also note that you need to constantly pick up the crystals because they will disappear if left untouched for ~30 seconds. TentaclesHave 2 attacks, both with reasonable windup (~1 sec). One is a whirl attack, which knocks back. The other is an overhead swing which just does damage. Jade ColossusJade colossus have perma stability and projectile reflection. Their only noteworthy attack is a pbaoe knockdown (~2 second duration). 
|
|
|
|
Post by buhwhyen on Apr 26, 2013 19:57:34 GMT -5
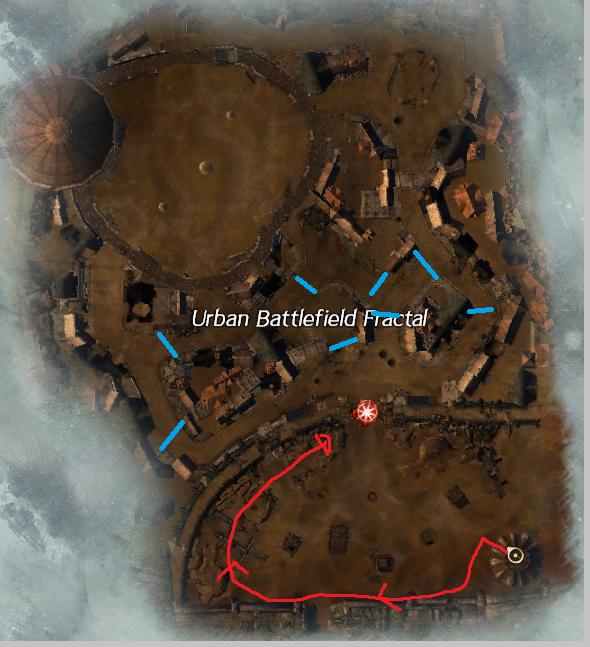
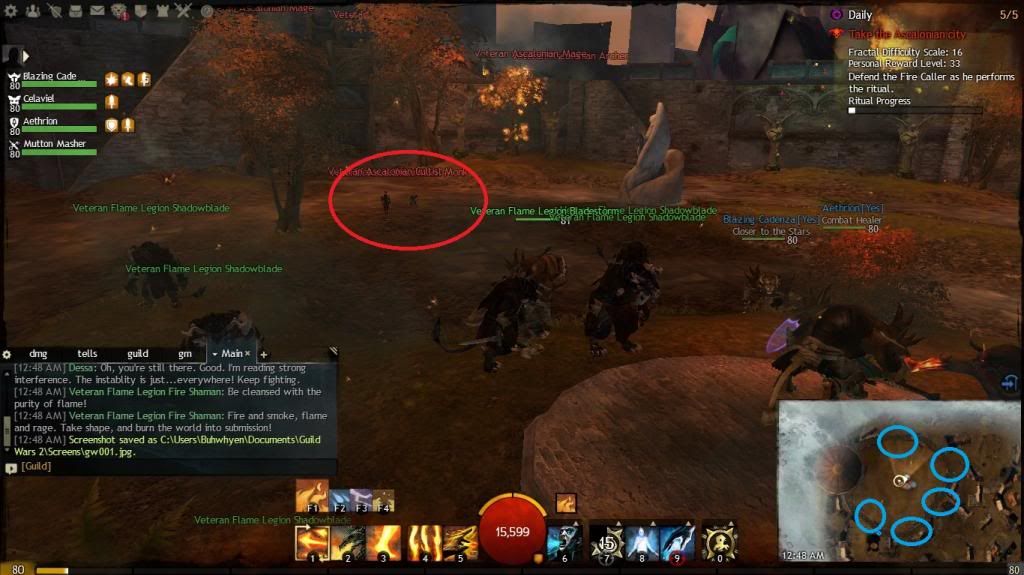
Ascalon Fractal Run around the west side of the fractal and avoid the middle. This way you only have to fight a single set at the gate.  Red circle = the only set you have to kill. Pink circle = the 3 pots of burning oil you have to kill. Blue circle = Siege Master Dulfy  Dulfy and the gate Dulfy and the gateYou have to kill Siegemaster Dulfy and break down gate. There will be 2 arrow carts, 2 ballista (ignore the arrow carts + ballistas), and 3 pots of oil. Kill the oil first, then Dulfy and finally the gate. City leading to the courtyardPaths will be blocked at random. Usually circling around the west side is unblocked, but this path feels longer than going around the east side. Blue lines signify where blockades may be set up. Kill sets and continue till you reach another gate with oil. Break the gate to enter the courtyard. CourtyardThere will be 4 or 5 sets of mobs and ~5 arrow carts and ballistas. You want to pull 2 sets (one at a time) to the gate and dps them down. After the 2 sets are down, your primary focus should be to kill ballistas, then arrow carts, then mobs. Your npc allies should be able to tank the npcs for quite a while. After everything is cleared, rez up allied npcs who died (warrior warbanner can revive downed npc allies). You have to now protect the shaman while he channels a spell. Groups of 3 veteran mobs will spawn from the various gates to get into the courtyard. Blue circles on the minimap are the gate locations. Spawns should start from the north gate and go clockwise in order.  Captain Ashym Captain AshymAshym has perma un-removable protection and retaliation, he will also switch weapons based on his current health. You want to start this fight grouped up on the grey circle at the top of the hill where the statue used to be (as shown below), otherwise npcs don't all aggro.  You should stay grouped up until Ashym reaches ~60% health, then you should spread out and not melee for the remainder of the fight. At 50%, Ashym will switch to staff and will use an aoe fireblast (radius ~900 range – this is also an agony attack). Once he reaches ~30% health, if you are within melee range he switches to fiery greatsword (same skills as elementalist elite fiery greatsword conjure). This is his most powerful weapon, but it only comes out if you enter melee with him. He is very capable of wiping an entire party in 1-2 skill uses if you do not spread out when he uses greatsword.
|
|
|
|
Post by buhwhyen on Apr 26, 2013 19:58:37 GMT -5
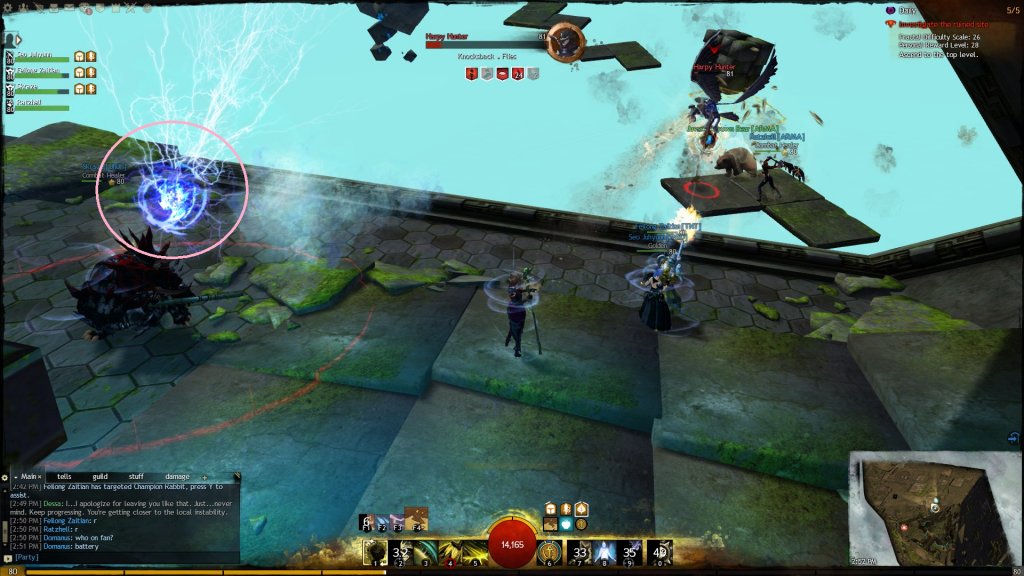
Asura Puzzle FractalThis fractal is one of the easier fractals pre level 10, at and after level 10 it can be quite frustrating because the harpies gain an aoe knockback attack. It looks like:  Beginning BeginningJump up the platforms and kill the harpies on the platforms. If everyone uses range attacks, you can generally kill 1 at a time. Though this method is quite a bit slower than if you all stand in melee range (everyone on the same platform as the harpy). On level 10+ you want to all be on the same platform so you can share aoe projectile reflection, stability, and blocking. At the top of the platforms, kill the node at the far end of the room to release 4 mobs. The order for killing is: bunny → saboteur → shaman → ettin. Ramp runThe next section is running up a ramp with electric pulses. The electric pulses do a considerable amount of damage, for most classes they will 1 shot you, though high health players can sometimes get hit by 1 and survive (2 will down anyone). You can dodge through them, block them, use projectile reflection (projectile reflection is not recommended) or simply avoid them by strafing left/right. Miniboss – Old TomMake sure everyone is at least inside the hallway leading into the room. All exits are shut when you aggro the boss, and anyone not in the room cannot participate in the fight. Poison will pour into the room constantly once the fight starts. To stop the poison you have to activate the fan at the back of the room. Old Tom himself will not move during the entire fight. His main attack is a spin attack that shoots green projectiles in random directions for a set duration. Elementalists, Thieves, and Guardians can stop this with swirling crystals (focus/air 4), smoke screen, and spirit shield summon. Smoke screen should be placed inside of Old Tom's body. On level 10+, the fight changes slightly. The fan will now require you to insert batteries in order to function. The “batteries” are the tears of dwayna? At the back of the room near the fan control. One crystal needs to be placed in both the left and right battery terminal before the fan can be activated. You should set-up the batteries before the fight (half to the left terminal, the other half to the right terminal). Batteries are only drained when the fan is running, and the power level of the current batteries are shown on both left/right terminals as well as on the fan control. More harpies and jumping on platforms. Similar to the first section of the fractal, except you move horizontally, and not vertically. Projectile reflection/stability is much more important during this part than it was during the first section. Boss – Raving AsuraYou never actually attack/kill the Asura, only his golems. You first kill the 4 golems individually (one at at time), then all 4 at once. After you kill each golem twice, the fight is over. The attack worth noting is the Asura has a triple electric ball attack that needs to be dodged/reflected (also an agony attack lv 10+). The Asura is 100% invicible during the fight and does move/body block.
|
|
|
|
Post by buhwhyen on Apr 26, 2013 20:03:09 GMT -5
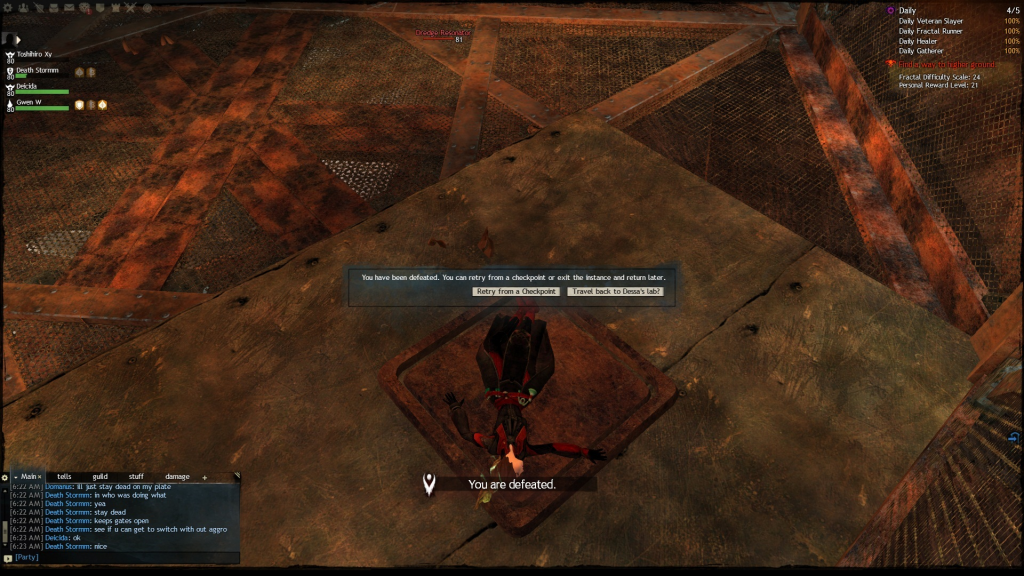
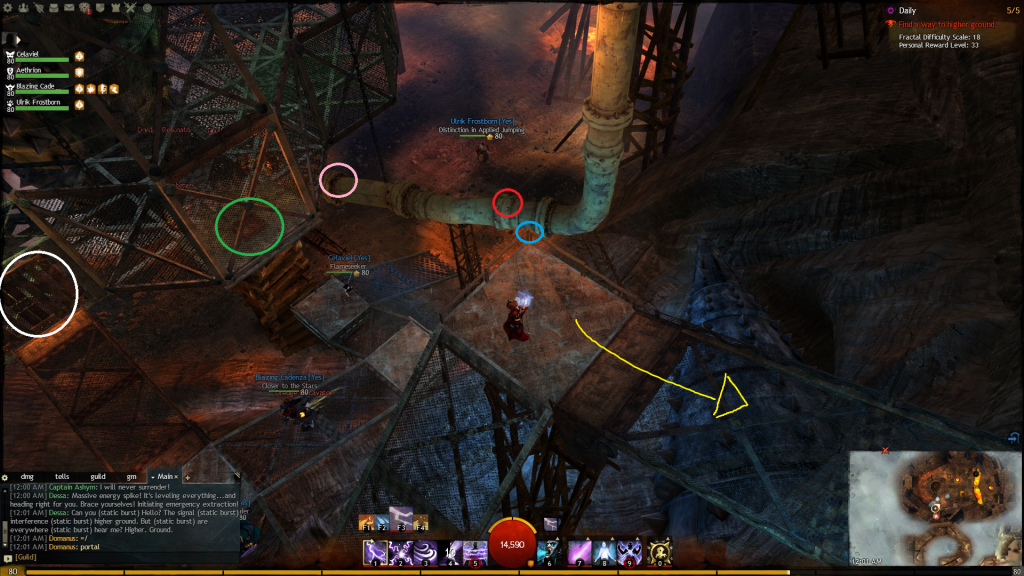
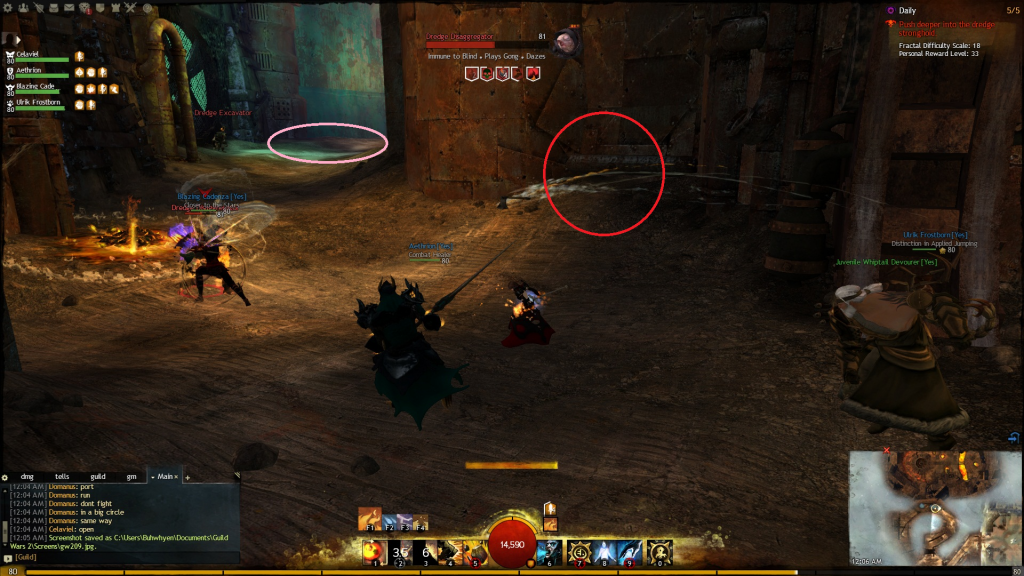
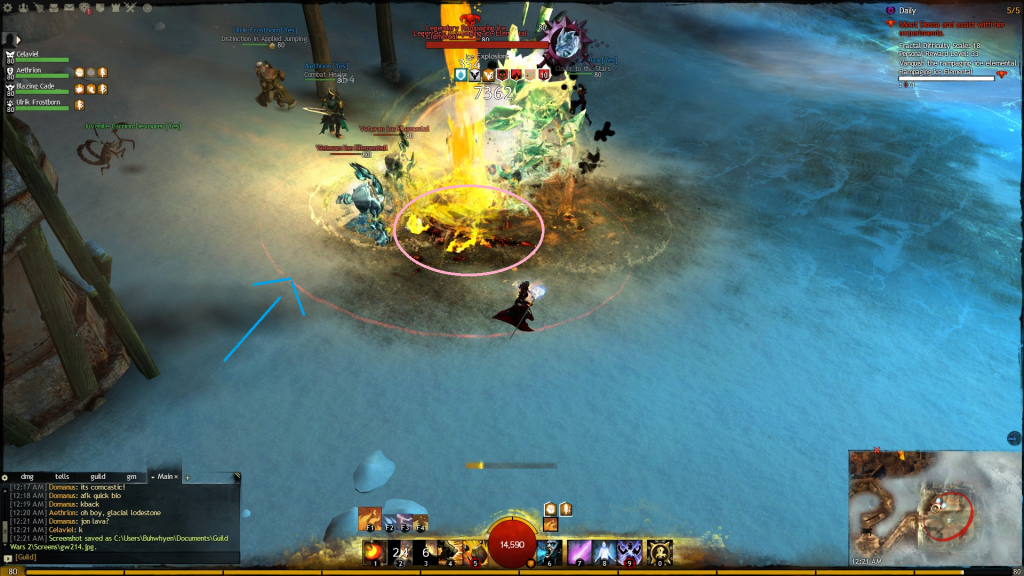
Dredge FractalSkill recommendations: Projectile reflection -Wall of reflection (Guardians) -Smoke screen (Thieves) At the start you have to stand on pressure plates (they're only activated as long as someone stands on top of them) in order to open gate to proceed. There are 2 gates and a door controlling switch during this part of the fractal.  Pink circles are the two gates Red circle is the ramp to the first switch (if you don't skip) Blue circle is the ramp to the second switch  Note: Note: You can be dead on a switch and still activate it. So if you die on a switch in the last room, don't release till the last door is successfully opened. The basic set up is: one person activates the first switch, the 4 other party members run through the gate, and then do similarly for the second switch (1 person activates the switch while the others run through the gate. Activating any switch will open all the gates so whoever opened the first gate can walk through the first and second gate when the second pressure plate is activated. After the second gate, you will be in a circular room with a pillar in the center. This room has 2 pressure plates and the door controlling switch (the switch is behind a door that only is open if both pressure plates in the room are activated – the switch must also be channeled for roughly 20 seconds without getting hit). This room will be filled with regular and veteran dredge that respawn when killed, so in general you do not want to constantly be killing the dredge because they respawn close to the control panel switch. If you can channel the switch for the full duration, a door exiting the room will open leading to the next step of the fractal. Note: Stealth is particularly useful for this fractal overall. You can activate the switches while stealthed to help avoid gaining aggro . ShortcutsThere are 2 shortcuts to bypass doing the switches to open the 2 gates. The first is to jump into the cage (over the wall). You do this by having the entire party go up the ramp to the first switch, but instead of going into the cage, you hop onto the rail and onto the ledge on the outside of the cage. Hug that wall and go around the corner till you're at the corner right above the switch + 2 plate room. With swiftness, you can jump over the wall and into the room. The only requirement to do this is that you have some sort of group swiftness and/or every party member can give themselves swiftness. The second shortcut requires a mesmer. You can portal + blink through the wall of the switch + 2 plate room. This part also, like the first shortcut, requires everyone to have swiftness to make this jump. Blue = Jump starting point Red = Jump landing point Pink = Portal spot into the cage Green = One of the pressure plates (second plate is on theopposite side of the room) White = door that opens after the switch is activated (to leave the room) Yellow arrow = direction of the next part of the fractal (after the switch is activated)  Here, you will randomly be assigned to either the bomb (right) or turret (left) path. Turret pathAt the start of this path, a large number of dredge will spawn towards the end of the first hallway. You want to abuse line of sight and stay against the right side wall behind a corner. This helps stack the mobs for aoe. Skills such as Guardian's line of warding (staff 5), Elementalists static field (staff/air 5) also help to stack mobs. You will also want projectile reflection because most of the damage from dredge are projectiles. Aoe stability also helps because dredge have relatively long daze (~3s). First pull line of sight spot  After you clear this first set, you can kill the turrets from the bottom of the ramp (don't melee them - more dredge will spawn if you walk up towards the top of the ramp). After you kill all 3 turrets, walk up to spawn the dredge, and pull back to the bottom of the ramp behind the right side corner to again stack mobs. Second line of sight spot below the ramp  Turret spawn locations - you want to try to stay below the pink line while killing the turrets  After you kill the spawns, there will be 3 veteran dredge next to a blast door. Each one of these dredge have a mining cannon that is used to break through the door. Once you start breaking the door with the cannons, a large number of dredge will spawn. It is very nice to have a thief to use shadow refuge for aoe stealth. Otherwise you can use smoke fields + blast finishers. If you cannot stealth, then put up projectile reflection, and have 2 party members without cannons try and grab aggro and stay away from the door. The dredge that spawn during the door breaking will disappear when the door is broken through and are not aggro'd. Bomb pathThere will be a pretty large set similarly to the turret path at the beginning as well. Though unlike the turret path, you want to push up to the stairs and put up crowd control to help stack the mobs and aoe them down. Alternatively you can run into the cages on the platform where the dredge are (does a better job of stacking mobs, but you sacrifice a lot of vision inside the cage, and risk people dying before you get into the cages). After the set is clear, the majority of the remaining dredge will respawn when killed, so you shouldn't bother killing more until the door is open and most of the dredge despawn. There will be bombs scattered in the hallway before the blast door. You have to pick them up and use the 1 ability to plant them near the door. After you set 1-2 bombs, you run back out of the hallway and lose aggro while the bombs respawn. After 2-3 bombing runs the door should break and most of the dredge should despawn. Miniboss – RabsovichHere you have to kill a set number of dredge and the champion Rabsovich (he spawns 1 vet constantly – though only 1 can be out at a time. So generally you ignore it whenever possible). The order doesn't matter as long as everything dies. The regular dredge spawn in groups from the back of the vehicle. The two general methods for this fight are to either: -Kill Rabsovich first This is pretty risky, but can speed up the event. You can do this one of two ways. Either pull Rabsovich and the first set to the far side of the room, kill down the regular mobs, then Rabsovich. If you're on the far side of the room, the newly spawned dredge will not aggro you and you can kill Rabsovich then sit at the back of the vehicle and kill dredge as they spawn. -Kill dredge spawns first This is the safer, but slower method (usually what gets done). One person pulls to the door. You can line of sight them to the right of the door (Rabsovich resets when he tries to pass through the door) and pull them just outside Rabsovich's room. Repeat till all spawns are dead and you can kill Rabsovich while kiting his veteran spawn. Final Boss – Ice elemental or dredge mining suitThere are 2 possible bosses based on which path you got previously (turret or bomb). Either way the basic fight mechanics are the same. You need to superheat the boss by dropping lava on top of him (they get a fire aura when they are superheated), while superheated they take considerably more damage. You drop lava from the controllers/switches on top of the platforms that line the outer edge of the room. Where the lava drops is marked on the ground by molten ground, though the area affected is larger than shown on the ground. One person just drop lava (there is a ~2s delay after you hit the switch before the lava drops). And the remaining party members dps from range. This is a no melee fight, you want to constantly be moving to the next lava spot while constantly dps'ing. If you enter melee range, the boss will stop/pause to do one of its melee/close range attacks. The main goal of this fight is to always keep the superheated debuff on the boss. Both bosses have channel heals. The animation for the heal (for both bosses) is kneeling down. Any interrupt (except ranged knockback) will stop the heal. Pink circle = the marking on the ground that showing where the lava will drop. Arrow points to the area that is hit by lava  Lava controller on the platforms  Ice elemental Ice elementalHas 3-4 adds (veteran ice elementals). These respawn when killed, so ignore them. His big attack is a ice crystal aoe (similar to elementalist staff/water 2) that appears over every party member. This is also a knockdown skill (and agony attack for lv 10+). His other 2 attacks are a chill field (similar to elementalist staff/water 4), and a cone close-range attack. Ice elemental is the tougher of the 2 bosses. Dredge mining suitHas no adds, just the boss. His big attacks are a bomb toss (throws 5 bombs towards the general area of the party (agony attack lv 10+). His other big attack is he pummels the ground and hits a large aoe? (not sure if you can avoid this by being far away or not) that does damage every tick it is channeled (also an agony attack lv 10+). His melee attack is a double stab and a jump attack.
|
|

